I wanted to make little make-up bags for the "faux make-up" my friend and I are making tomorrow. I didn't have a pattern...just an idea in my head of what I wanted it to look like and how to make it. I made the blue one first...then learned a few things and made the floral/stripe one. All of the materials, I had on hand (score) so I feel like I made them for free!

I actually wanted this one to be mainly the floral fabric, but I had very little of it...so I used it as the front piece.

The front piece (one each of each fabric) is 5 X 9 (totally random...but seemed like a good height and the width fits my makeup. Stitched them, right sides together...turned them right sides out and stitched the closure...


The back piece, I cut 9 inches wide and 7 inches tall (2" turn down). Then I notched in 1/4" (seam) in on the side and top and cut a diagonal, so the folded down part looks more finished (professional?:)
Stitch the two pieces together again and turn out and stitch closure.

Then I stitched the front and back together (I stitched with the floral in so when I flipped the floral would be facing out on the finished product). I just stitched the bottom half and left the fold down part alone. (am I making sense yet?)

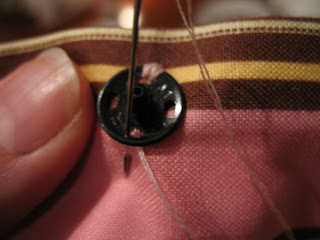
I DID NOT want to do a button hole...so I stitched on a snap. I learned from the blue case that it looks better when it is stitched just through one layer of fabric (no stitches showing on the top flap). I also learned to hide the thread when moving from one hole to another, to take the needle/thread under the snap...

perfect...

Even though I didn't do a button hole...I added a button to both, just to add a little something more to the make-up bags.

The perfect size for a 4 year-old...don't you think?

1 comment:
Sammy and Hannah would love these, I think I will have to make one for them. Thanks for the directions!!
Post a Comment