Showing posts with label tutorial. Show all posts

Thursday, December 9, 2010

Homemade Christmas Gifts #2

I don't have a little girl, so I don't ever make little hair blingy things...
kinda sad.
I'm over it...I have some way cute little nieces...
I can get the hair blingy thing making out on them.

I wanted to make a hair bow to match my little girl monster shirt.
I used the same fabric from the shirt and cut out 3" and 2" circles, then folded them over and over again.

Then glued the 3" pie pieces to a small square.

and the 2" pieces to the 3" pieces.

Then a little small circle and a button.

I glued it to a little headband and wallah...
Monster meet hair blingy thing.

I made her one more (because I can).
I made this one using Juniper's tutorial...I LOVE these little flowers. I have made some to attach to some of my pearl necklaces. They are super easy to make and super cute.

-LOVE-

Can I wear these too?

Sunday, August 29, 2010

homemade decorative plates

I looked and looked for 2 plates to hang above my pantry door, but didn't find any that I really loved...or wanted to spend money on. I was at the dollar store and saw some plates (for a dollar of course:) and thought...hey, want not just make some plates.

I used brown, green and yellow vinyl and
the storybook cartridge (which is awesome).


I didn't really have a plan at first. I picked a few shapes that I really liked and cut them out in a few different sizes and placed them till I liked how it looked.
I didn't use my transfer paper on the first shape and ended up pulling it off...with all the little cuts it was just sticking all over my hands...the transfer paper made it MUCH easier to put it just where I wanted.


I decided to do a little monogram on one of them too.

And there you go. So fast. So easy.

SO cheap!


I'm linkin' to these parties.

Friday, July 16, 2010

A Lamp Makeover

I'm ever so slowly ridding my house of all things from Mr. T's bachelor pad (okay, not that slowly...but it has been 7 years for heaven's sake).

This week...get some "new lamps" for the living room makeover.

Step 1:
get your lamp (you know...the one you have but hate)

step 2:
buy 15" Pottery Barn lamp shades at NPS for $8.

step 3:
spray paint the gold parts ORB and then to cover your big mess...spray paint the inside heirloom white (cause you have it all on hand:)


step 4:
(forgot to take pics of this process so try and follow along:)
Roll out some Christmas paper with the white facing up...lay your tapered drum shade on the paper and mark the middle at the top and bottom. as you roll your shade to the right and then to the left...trace along with a pencil.
Cut out the "pattern" and pin it to the wrong side of your fabric...then cut out your fabric.
(make sense?)


big hint: if you want the fabric to fold over the top of the shade...cut your pattern an inch bigger at the top and bottom...I am adding trim so I cut it to size.

step 5:
glue your start on the seam with fabric glue, then using a spray adhesive...spray a small section and roll the fabric over...make sure it lines up with the top and bottom and rub smooth.


step 6:
when you get back around to the start...
cut off the extra fabric and glue a hem and then glue your hem down.


step 7: be amazed that you just covered a tapered drum shade.

step 8:
hot glue on some trim.

step 9:
spray paint the base with your ORB.

remind yourself about the
Before:


step 10:
enjoy your "brand new" lamp!


Total cost:
base: previously owned
Shade: $8
Fabric: $2
Trim: $3
Spray paint: previously owned

Total cost: $13

Step 11: go spend the $33 dollars you saved by not buying one of these pottery barn shades!

I'm linkin' to:


Saturday, May 1, 2010

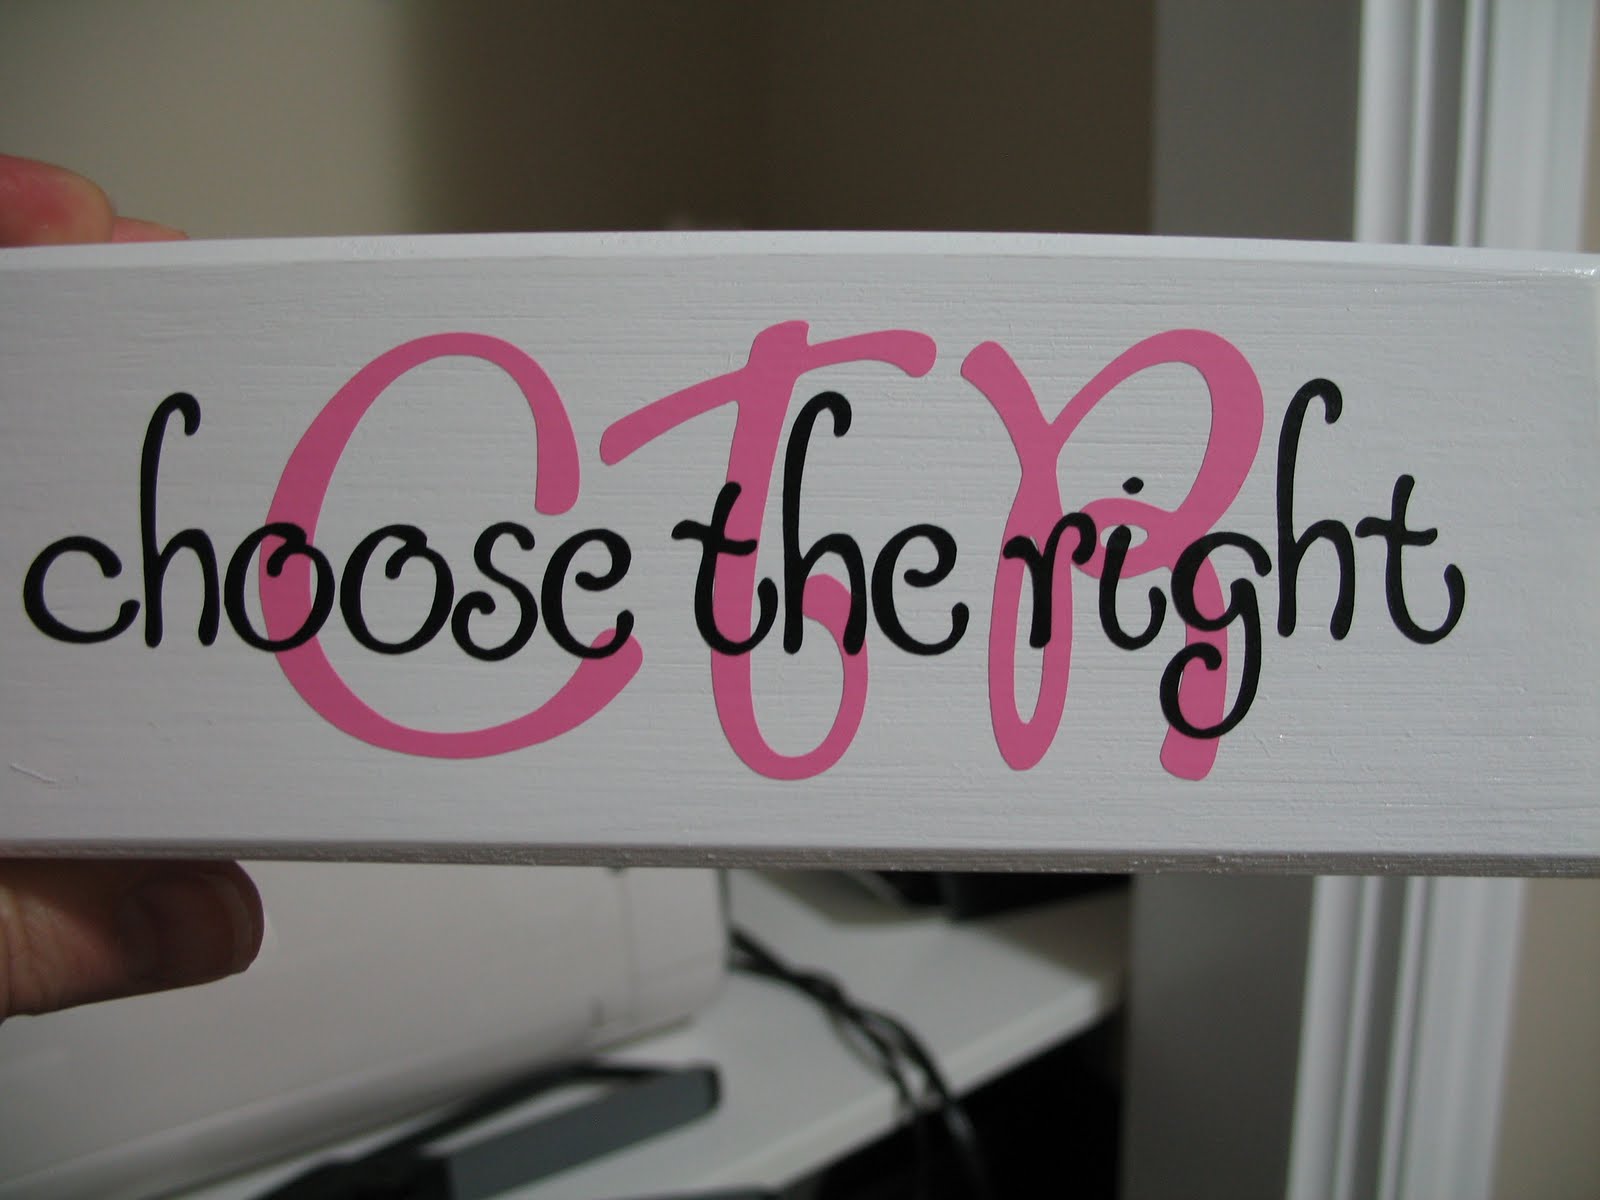
Sunday Share #2...CTR photo blocks


Each year the primary presidency gives a baptism gift. The past few years, they have been giving a white towel tied up with testimonies written by the Young Women in the ward. This year, I wanted to do something different and cheaper (since we have 10 kids turning 8).

I wanted to make each of them a block that said "Choose the Right" on it, but then decided to go a step farther and make it such that they could attach a picture from their baptism day to it...

So this is what I came up with.

I found these blocks at the Wood Connection for $1.25 a piece.
(I'm sure you could buy wood and cut it yourself...but this worked for me)
I painted them in high gloss white, since it was out from all my door and trim painting.

To make the photo holder I used 16 gauge wire and my jewelry pliers.


I started the circles with the pliers, till there was enough to turn with my fingers
(without killing them:)


Then I kept turning until I got the size that looked about right.


I found a bit that was the size of my wire and drilled a hole in the top of each block.


and stuck it in...I didn't glue them because they fit pretty snug and if the kids ever wanted the block without the photo, it can be pulled out.


Using my cricut, vinyl, and my lyrical letters cartridge, I cut out all the lettering.
I used the loopy dee loop font.
The "CTR" is 3 inches and the "choose the right" is 1 inch.


I eyeballed the "CTR" placement...
but used transfer paper for the "choose the right"


insert photo...
(preferably one from their baptism day..not that hanging on the beach is a wrong choice...just not what I had in mind...but what I had on hand:)

I really loved how they turned out. And the beauty about this gift...the possibilities are endless with what you can put on them and the types of pictures you can display.

I may have to make a few extra to give as gifts to my nephew and cousin's kids that are turning 8 this year. And maybe instead of Choose the Right down the middle I could put their name?

I'm linkin to


Tuesday, April 20, 2010

Tutorial Tuesday...how I paint.

Every Tuesday over at Hope Studios...there is a fun party where you can learn so many things...or share something for others to learn.


I just love this party...but haven't had much time to work up a tutorial since all I have done the past few weeks is paint and demo the house....
SO....
(after whining about not being able to attend the party...I know...I'm a big baby)
I'm gonna share my painting tips and tricks.

First off, let me say...
I LOVE TO PAINT...I do...I LOVE it! And I can still say this after painting my mom's rec room (in January), my guest room and play room (in February/March), my family room, kitchen, living room, 2 stairways, a hallway, a bathroom, a pantry and the laundry room (in March/April). I think it is safe to assume that painting is something I enjoy and I don't have any plans of stopping just yet...I'm sure there are a few more walls that could use a new coat of paint...and it hasn't just been the walls...the ceilings have been painted along with the remaining baseboards and door moldings. Oh...and the doors all got painted, but I can't take credit for my mom's handy work.

Alright, on with my tips.

#1: DON'T paint alone. Hire a friend or fly in a relative. Painting is much more enjoyable when there is someone to chat with AND if you are standing at the top of a ladder, you may need someone there to hand you a brush, roller, paint can, rag...you know...whatever:) Oh...and the biggest bonus...lot's more can get accomplished when there are 2 of you with rollers in your hands.

#2: Tape...oh wait...DON'T tape. I HATE taping...I think it is a waste of time. Some people like to tape...I am not one of those. The previous owner (of my home) should have taped...


That is one of the reasons why I had to start at the ceilings and work my way down...most ceilings and ALL my door moldings looked like that...I mean really, did she even try?

a good brush...that is all you need...oh, and a semi-steady hand.
I LOVE this one...purdy...2" angle...or no angle...either are great!


My real issue with tape...I spend all the time doing it...only for it seep anyway...then I'm just angry that I wasted time to still have a sloppy edge. I have heard great things about frog tape...but haven't tried it yet...Don't want to spend the money when I can get a straight clean edge on my own. So for me it's NO TAPE!

#3: Prep the room first. Walk the room/rooms you are going to paint removing all outlet plates, etc AND patching all the holes, dings and bashes. I LOVE the pink stuff that dries white. So easy to put on and dries super quick. Sand it smooth and you are good to go. There is nothing worse the rolling along and coming upon ANOTHER hole or divot...so walk the room first and try to get it all before you start painting. And fill even the littlest divots...your walls will look so much better.

#4: roll first...cut in second. I don't always do this...and I waste a lot of time painting farther down on the wall then I need to (with my brush)...'cause you can get very close to the ceiling with a roller and your cutting in will go much faster.

#5: If you are painting EVERYTHING...paint the ceilings first and don't worry about getting it on the walls...paint the moldings and don't worry about getting it on the walls. THEN paint the walls last, cutting in at the ceilings and moldings...SO much easier to cut in that way.

#6: If you have LOTS of painting to do...don't wash out your roller...stick it in a plastic grocery bag (one without holes...good luck finding one:) and then stick it in the fridge until the next time you need it. My ceiling roller was in my fridge for a month...pulled it out and did the next room...no problems...painted just great. My husband keeps laughing at me that there are 5 (yes, 5) rollers in our fridge...but I ain't cleaning them up till ALL the painting and touch-ups are done. Case in point...the family room was done till my mom banged it with a door and know I have some touching up to do (it's okay mom...all the door painting you did makes up for it). My uncle told my mom this trick years ago...has saved us so much time and energy on the silly "wash the rollers" routine. And I'll be honest, when I really am all done...I'm throwing those rollers away.

#7: put the lid on the can...if you aren't painting directly out of it or in the midst of dumping into the tray...put the lid on. I have found that when I leave it sitting open...the paint on the sides dries a bit and then gets in my paint and then I end up rolling on little glops of rubbery paint and have to pick them off and rerolling and my gracious it's annoying. Maybe I'm the only one this happens to...but if not...put the lid on.

#8: ALWAYS have a wet rag close by...you know for those not so near misses on your ceilings, moldings, uncovered floors, etc. It's amazing what a wet rag can get out if you immediately get to it.

#9: This is my sisters trick. She not only has paint clothes, put paint flip flops...AND...she only walks on the drop cloths with her flip flops, if she is going to step onto the flooring, she steps out of them. That way, if she has stepped on any paint...it stays on the flip flops and on the drop cloths, leaving the flooring clean and paint free.

#10: Don't get lazy. It's really easy after painting for hours and days on end to get to that point where you say, "oh...no one will notice"...'cause you will and it will BUG you. It was good to have my sister here to remind me of this when I wanted to skip a second coat on a molding...do take the extra time to make it perfect...you will be so happy and won't kick yourself a week later.

Happy Painting!

Oh...and by the way...I also happen to be sponsoring a giveaway (T's Etc) for this weeks Tutorial Tuesday party...so don't forget to get yourself entered:)

Saturday, March 27, 2010

M-I-C-K-E-Y...you know the rest...

Lil D's 3rd birthday is this Tuesday...we are having a family party this year, but that doesn't mean I can't have a theme and have a little fun making some decor:)

I was standing in the party store trying to decide what to do this year. Lil D doesn't have a real strong opinion about it...he just loves green...ask him what he wants for his birthday..."all green stuff"...SO, since we did Monkeys for his 1st birthday and cars for his 2nd birthday, I decided to go with his current love...
MICKEY MOUSE (clubhouse)

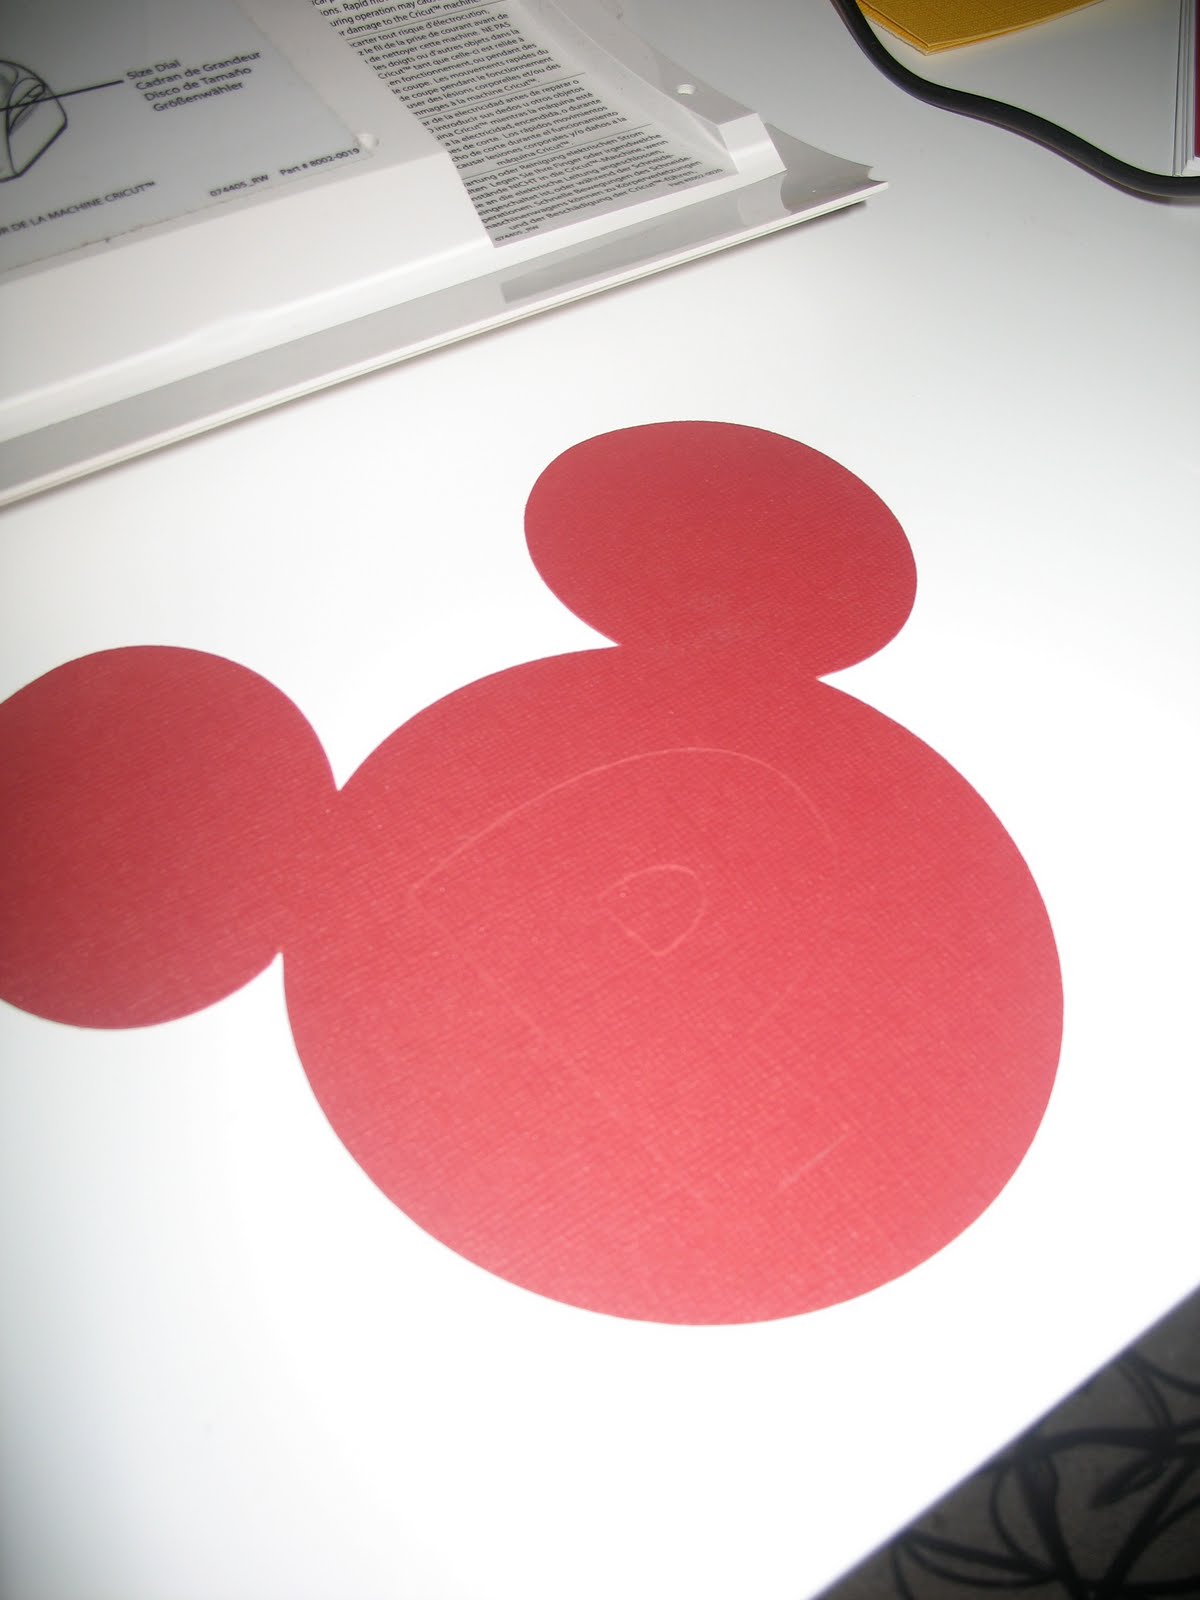
I bought some invites (I don't have time to make them this year)...a table cloth...some napkins...and wrapping paper and headed home. I wasn't sure what I was going to do yet...till I got to the craft closet and remembered I had a Disney cricut cartridge...hello fun! One of the functions is a Mickey head with all of the letters and numbers cut from the middle of it. So my first project: A happy birthday banner made from Mickey heads.

Lil D LOVES to help with the cricut, scary as it may be...he can open it...put the cartridge in...load the paper and cut the paper all by himself...nice!

So here is my lovely assistant showing us how to get those Mickey heads cut out...


The cricut (with Lil D's assistance) cut out each Mickey head with each letter along with 4 Mickey heads cut out in Mickey scrapbook paper. Because many of the letters have centers, I backed each one with a white square...

then I put the letter back in, and the center in with some glue...

Then removed the letter...the center is now perfectly placed...
(or you can just eyeball it:)

I used black brads to attach the heads together...

It's a REALLY long banner...but I can't wait to hang it up!
(I'm having a hard time waiting till Tuesday)

Since we are having Lil D's party at Chuck E Cheese (read...the house demo is beginning and I refuse to have people at my home for a party in the mess), I am making cupcakes (I LOVE to decorate cakes...but cupcakes will be easier to eat away from home). I am going to use my new cupcake holder covered in Mickey wrapping paper. I will be making chocolate cupcakes with white frosting (in red and yellow papers)...and these cute little Mouse heads will be the cupcake toppers...(They are 2 inches tall)

I decided that I needed to take the mouse head with a three cut-out another step farther. I bought some black fabric, with little tiny white dots, and cut out a 5 1/2 inch mouse head with a 3 in it. The cricut works great on fabric...but it must be really stiff. I used heat n bond, since I was going to iron it on anyway, and that makes it plenty stiff. I also tape my fabric down to the sticky pad (just for added assurance that the fabric won't slip)


I ironed Mickey's head :) to the front of the shirt and the 3 that was cut out to the top back of the shirt. Then I did a satin stitch all the way around the head and number.

On a green shirt, of course, 'cause Lil D LOVES green!


I can't wait until Saturday, for Lil D to sport his shirt and to get it all put together...I'll post pics next weekend of it all put together.

I am also going to make a "birthday boy" t-shirt for him to wear on his actual birthday.
(the thread I was using kept breaking during my first attempt, so I am going to try again tonight with some different thread...any suggestions would help...my black thread did great on Mickey so I don't know what the problem is).

I'm linkin' to:


Related Posts with Thumbnails